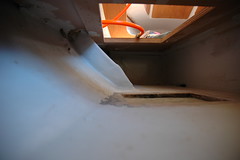
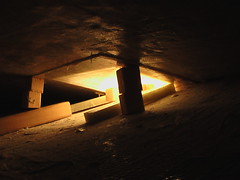
Ballast Tank Part 1: Soggy floor in the bathroom
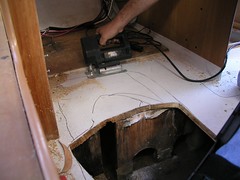
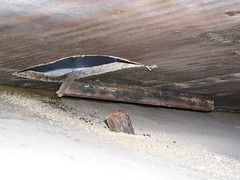
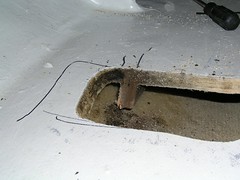
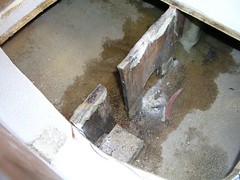
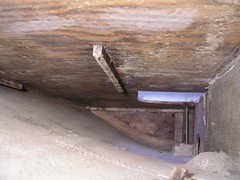
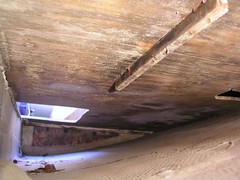
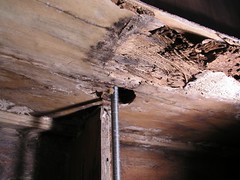
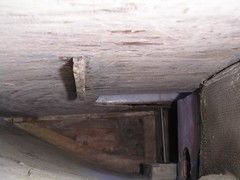
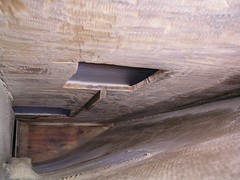
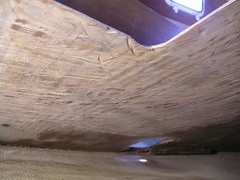
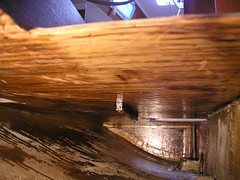
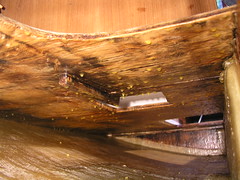
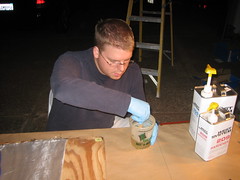
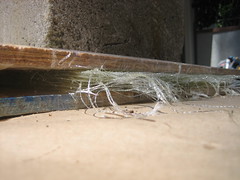
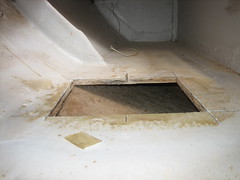
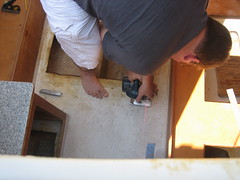
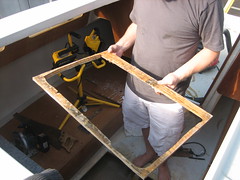
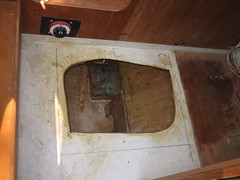
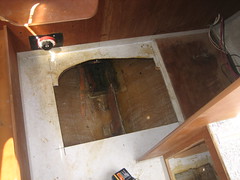
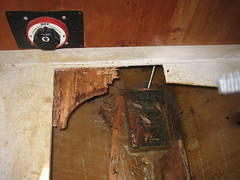
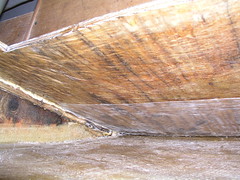
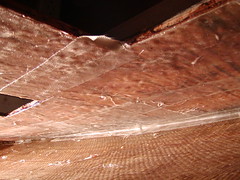
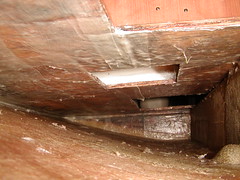
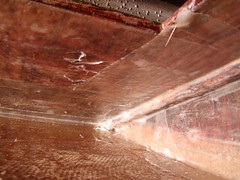
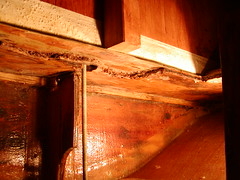
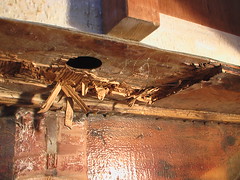
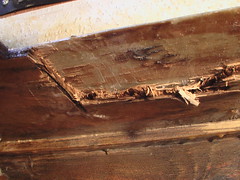
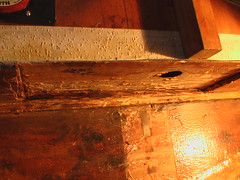
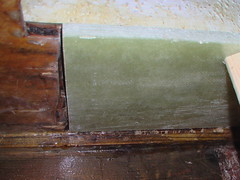
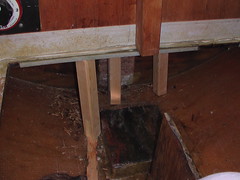
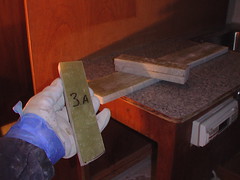
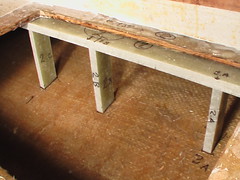
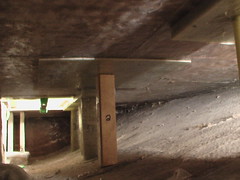
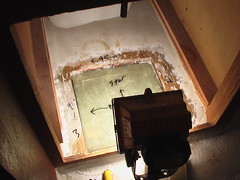
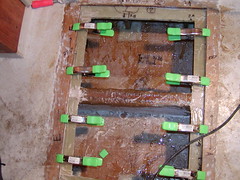
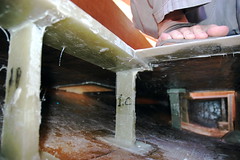
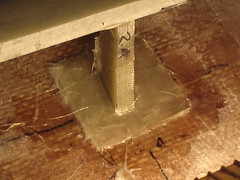
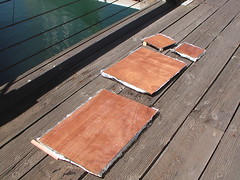
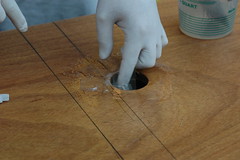
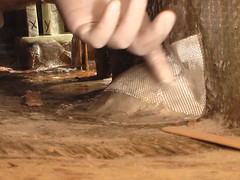
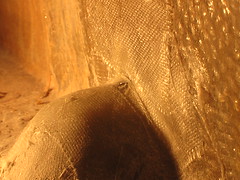
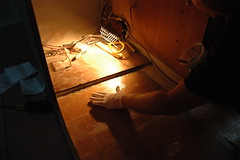
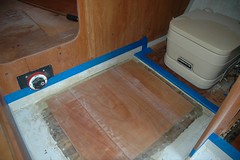
While I was cleaning up from the broken mast mess at Lexington, I was checking out the compression post in the bathroom, and noticed that the floor was bouncy. I described it to others in that I could have put my foot through the floor if I wanted and/or tried to. I took off the bathroom door, and per my instructions from my boat guy, I started to lightly hammer with the round side of a hammer the floor in a grid pattern to find the soft spots. I marked up the soft spots as you can see in #1 and then took the boat up to my guy since I was affraid to cut open the floor myself. He took his jigsaw and had a field day tearing open large holes all over the floor, where needed. The first piece of floor that we removed is seen in #2 and it was completely destroyed. The layers of laminated plywood were easile seperated from one another. This first piece also opened up the first view (#3) into the ballast tank. The compression post seen in #4 was very rotten and a simple whack of the fist made it crumble. I dont currently have any good pictures of the old compression post as it came apart, but it is shown on the the Dryrot Video below.
| #1 | #2 | #3 | #4 |
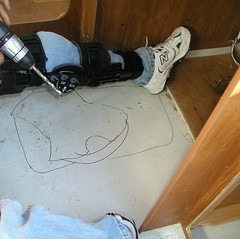 | 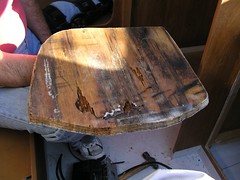 | 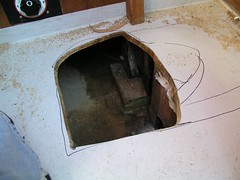 | 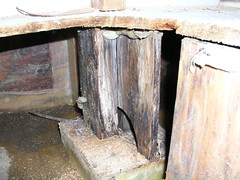 |
| Started by drawing out the soggy areas on the floor to be cut open | After a bit of drilling and cutting, we found our dryrot | First glimpse into the tank | Rotten compression post inside the tank. You can also see its still wet inside from sailing a few days earlier |
| #5 | #6 | #7 | #8 |
 |  |  |  |
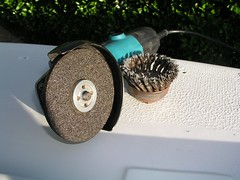
Ballast Tank Part 2: Grinding
| #1 | #2 | #3 | #4 |
 |  |  |  |
| #5 | #6 | #7 | #8 |
 |  |  |  |
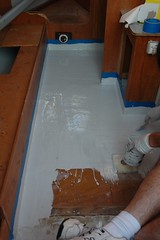
Ballast Tank Part 3: Penetrating Epoxy
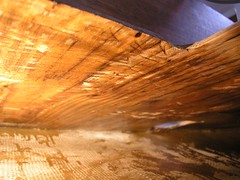
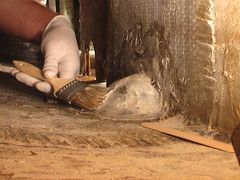
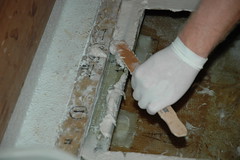
Because there was so much dryrot in the floor, or ceiling of the tank depending on how you look at it, I had to apply several coats of penetrating epoxy to seal the wood completely. The west marine brand penetrating epoxy was not the best stuff in the world, but the other brand I wanted to use was difficult to come by. The first coat of epoxy was tough, and quite difficult to apply as it was not easy to reah into some part of the tank from the available holes. I ended up applying seven coats of penetrating epoxy, which eventually created a nice thick seal of epoxy on the inside of the tank, and it made quite a dripping mess everywhere else. Once that was all done, which took about 2 weeks, as I waited 24-36 hours between each coat, I had to go back in with the grinder and lightly grind off all of the little droplets that were formed. Most of the drops formed around the eges where the brush had something to run into while applying the epoxy. You can see my application of this epoxy in one of the videos below.
One problem I ran into using the west marine brand penetrating epoxy was that they didnt sell it in large enough quantities, it was expensive, and if applied above 90 degrees, it would sieze up into a solid after about 7 minutes (#3). It started with a steam coming off the top, then I looked inside and saw the epoxy boiling, but before the bubbles could make it to the surface, it was solid. It also got very hot, hot enough to melt the mixing container I was using. I thought at first it was a fluke, maybe I had mixed some other element, i.e. acetone, into the epoxy that caused this rapid chemical reaction, but no, the second time it happened just the same. This time I was prepared with my digital camera. I took a bunch of pictures and put them together in this video on youtube, seen below.
| Epoxy Video | Rapid Epoxy Reaction Video |
| #1 | #2 | #3 | #4 |
 |  |  |  |
| After 1st Coat | After 1st Coat | Melted mixing container | After a few coats, you can see the drips |
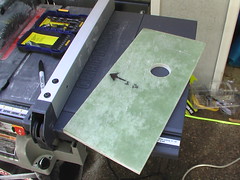
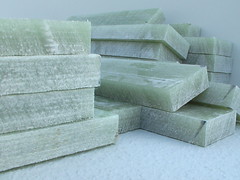
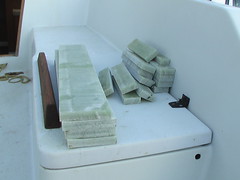
Ballast Tank Part 4: Fiberglass Board Fabrication
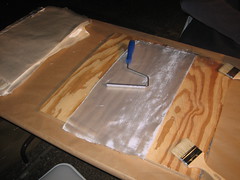
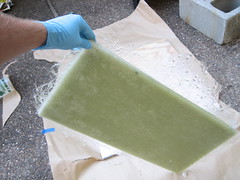
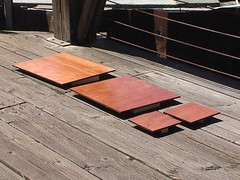
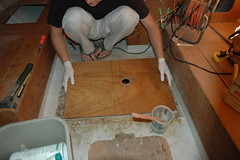
I must first state that making these boards was the most tedious, time consuming, and expensive part of rebuilding the ballast tank and floor. To begin, I purchased a 12" x 50 yard long roll of eglass tape from Tap Plastics. I also purchased part of a roll of 3/4th oz. weight fiberglass mat which was 38" wide and 30 yards long. I also needed epoxy, lots of epoxy to laminate these boards. See Supplies Section For pictures of and cost of supplies used.
Each of these parts were cut into 1'x 2' section to be laminated together into 'boards' like plywood. I was excited to make the first one because it was the first time I got to work with the fiberglass, but I soon learned that it was a very long and tedious process. The first board I made, was almost 1" thick when we were all done, and was comprised of about 100 total layers of 4 eglass, 5 mat, 4 eglass, 5 mat ... 4 eglass or 4x5x4{100}. This board took about 4 hours to laminate with the help of my friend Jess, and 24 hours to cure after that. It used almost 1/3rd of the gallon of epoxy, but once it was done, it was extremely strong. I used 2 sheets of plywood wrapped in suran wrap with a cinter block on top for 24 hours to squish out any excess epoxy and give it a nice compressed environment to cure in. The results are seen below.
| #1 | #2 | #3 | #4 |
 |  |  |  |
I made 3 boards this size, but the 2nd and 3rd ones were only 3/4ths an inch thick, and were about 70 layers, at 3x4x3{70}, taking about 2.5 to 3 hours to laminate each. I also made 2 boards that were still 2'x 1' but only 3x4x3{10}. These ones are going to be used to help seal the smaller holes in the tank, and to be used as lips to overhang and help seal around the larger holes.
I think I spent about 2 weeks laminating boards, making one every other or every other third night, along with trips to tap plastics, west marine and home depot for materials as I ran out. I learned that its way easier on my time and not very expensive to just dispose of each mixing container, mixing stick and brush after each use instead of cleaning the epoxy off of them. This sped up the process quite a bit.
Ballast Tank Part 5: Squaring up the holes
I needed to square up the holes to make it easier to lay the new plywood flooring in the holes. I should have done this part sooner as it would have made many of the other parts much easier but I didnt, and for not doing it sooner, I paid the price of being cramped up trying to apply epoxy on the inside of the tank.
| #1 | #2 | #3 | #4 |
 |  |  |  |
| #5 | #6 | #7 | #8 |
 |  |  | |
Ballast Tank Part 6: Glassing the top of the tank
Using the remaining quantities of the 12" roll of eglass tape, I cut strips that were 3' long and used the west systems high density filler to make a paste with the epoxy. This makes it possible to apply the glass upside down as it will stick better with epoxy that was just mixed. At 3' long, each piece of cut glass was almost too big to work with, but once the epoxy paste was applied it was not too difficult to get it laid up. It actually took much longer to clean out the tank with acetone and the shop vac, and remove any additional drips than it was to actually just apply
| #1 | #2 | #3 | #4 |
 |  |  |  |
Ballast Tank Part 7: Compression Post Area Mess
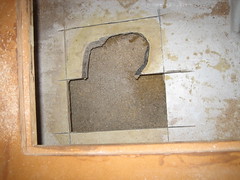
This section had bothered me for quite some time because I didnt really know what to do. The big issue was the fact that the dry rot went underneith the main bulkhead into the front valve compartment, making it more difficult to cut out the bad area. The soution was to chisel out a square piece from the under side and replace it with a laminated board sized the exact thickness to fit and replace the wood. It was really a pain in the ass to remove the wood. The wood that was the most rotten came out without any issues, but as I got further back, to make the area square, the wood got less rotten, and harder to remove. I think I spent a good 3 hours just chiseling out the wood.
| #1 | #2 | #3 | #4 |
 |  |  |  |
| The issue at hand | Chiseling away at the wood | Half way there, have to cut it back all the way to the 1"x1" bulkhead support beam | Squared up and ready for the fabricated board. The back looks a bit black because the grinder was used to clean up the chiseling, and it burned the wood a bit. |
The second part of this section was actually creating yet another fabricated board. This makes 2 additional boards needed for this area that I had not yet created. This one had to be exactly .5" thick and that was kind of a bitch to create, as I didnt know how many layers of glass to cut and prepare before actually laying the glass. In the next series of photos you can see how after I made the piece, it fit in place. I didnt get any photos of actually epoxying the thing in place.
| #5 | #6 | #7 | #8 |
 |  |  |  |
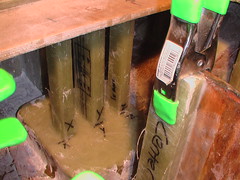
| Cut the ballast valve hole and am measuring to size to make it fit. | I had to go to Ace to actually get some scrap 1x1" boards to support the thing | Fits in there quite nicely | Ready to be epoxied in place |
There is another fabricated board that also goes under this one, but is a lot longer, actually 3 feet long instead of the 18 inches that the wood replacement board was. This board was also made a bit later and was to support the entire area, completely covering up the above piece of glass. Also not shown here is the aft facing center bulkhead that you can see in #1 in this section. I created a new one out of the remaining 2 foot section of laminated board that I used to replace the wood flooring.
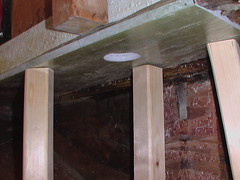
Ballast Tank Part 8: Floor Supports
The large fiberglass boards that I made were cut up and used to make floor upright supports to support the new floor boards and help support some of the weaker dry rot wood that has been covered with epoxy. I made 3 boards that were 1' x 2' and cut them into 2 different shapes. I needed 4 pieces that were 4" wide and 2' long to actually place alongside the wooden floor and held up by the smaller pieces cut that were about 1.5" wide by the hight needed to run from the hull floor to the bottom side of the 2' long piece. I aligned the 2 foot long 4 inch wide fiberglass boards as a border half way sticking into the access holes, to support the old floor, and the new board replacement that had to go in. These were bonded into place using thick West Systems Slow Epoxy with a high density filler mixed in. In order to better support the uprigths between the floor and the bottom of the hull, I hand laid down 4" square pieces of glass to act as a pad for the uprights to sit on and distribute the weight of the floor. I didnt want to have a piece of solid fiberglass pierce the hull from within the tank. I was not originally going to do this but my boat guy talked with Tom Schock and it was his recommendation.
| #1 | #2 | #3 | #4 |
 |  |  |  |
| #5 | #6 | #7 | #8 |
 |  |  |  |
| #9 | #10 | #11 | #12 |
 |  |  |  |
Ballast Tank Part 9: Plywood Preperation
| #1 | #2 | #3 | #4 |
 |  |  |  |
Ballast Tank Part 10: Centerboard Through Bolts
| #1 | #2 | #3 | #4 |
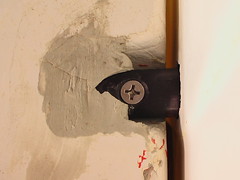 |  |  |  |
| New stainless steel bolt installed as seen from under the boat | Applying thick bondo to the nut to hold it in place | Glassing over the high density bondo to contain it and add strength | The final product, nut sealed with small hole in top as to not bond the bolt in place |
Ballast Tank Part 11: New Floor Installation
| #1 | #2 | #3 | #4 |
 |  |  |  |
| Applying the thick bondo to seal the floor | Placing the final board in place after drilling and sealing the hole for the table | Laying glass on the now sealed front ballast tank hole | Making sure everything is even |
Ballast Tank Part 12: Gelcoat
| #1 | #2 | #3 | #4 |
 |  |  | |
| Preparing for gel coat | Preparing for gelcaot | First layer of gelcoat being applied. |