Mods
Mast support pole in rear for trailering:
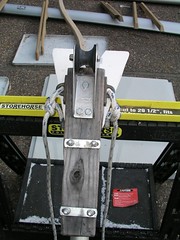
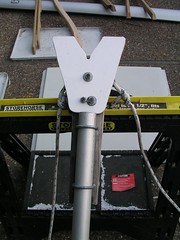
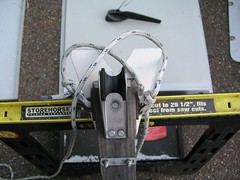
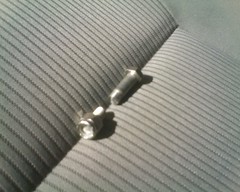
After buying a car shed cover for our back yard to put the boat under, the rear mast support pole for holding up the rear end of the mast while on the trailer was a bit too tall, and its function was not very efficient. To solve this issue we cut off about a foot from the pole, and built our own mast mount at the top. It is made out of a anchor roller/mount usually found at the front of a boat to roll off the chain. This placed upside down with a V cut out of wood like the original piece allowed for easy rolling back of the mast for rigging, and easy cleanup of the mast when de-rigging. LIfting the mast off the mast mount hinge angled the mast at the rear enough to make it roll on the wheel, making it glide smoothly for trailering. I also mounted two I loops onto the wooden part, and tied a line to each side. When secured, I throw a line over the mast and tie it to the rear cleat, and do the same on the other side to provide a very simple mast securing system form trailering.
 |
 |
 |
| Stern facing side seen from behind the boat with the mast ready to be put up. Lift on the mast to angle it onto the roller for easier rigging. |
Bow facing side as seen from on the boat with the mast down. |
Shown with the lines thrown over where the mast would be and secured to hold on the mast while trailering |
9.9hp Evenrude outboard:
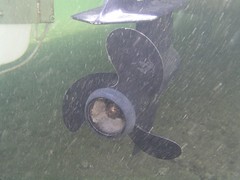
After sailing once out of the Santa Cruz harbor, we decided our little electric trolling motor was not sufficient. The local lake near our house will not allow gas engines so we use the electric one there. We were in the market for an outboard and are very happy with our 9.9hp extended shaft outboard. The only modification we needed for it was a throttle lock screw. One summer while at Huntington Lake, I showed the mechanic the problem, where I had to hold the rotating throttle the whole time I wanted to use it, and he had the perfect part to fix it. ~$30 later including the part and labor, the throttle could be locked into any position and the issue was solved. Since then the only other modification I've made was removing the kill switch clip. The engine now runs without having to have the clip installed and in its place is a little kill switch.
 |
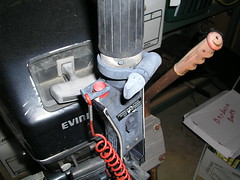 |
| My 9.9hp extended shaft outboard |
Photo showing throttle lock |
Foot stoppers, wooden handrails, spinnaker rig and harken traveler:
We drove the boat back up to Sausalito where we purchased it, and our guy built us a new mast. While he had it he also did some other upgrades that we've really enjoyed. For starters, he added new wooden toe rails on the front and the rear half of the cockpit. He also put on wooden handrails on the upper part of the deck forward of the mast. These are quite useful while climbing forward on the boat while heeling. We also had to replace the roller furler for the jib as the factory one was damaged in the mast accident. We ended up with an upgraded harken furler that made it much easier to raise and lower sails. While the boat was in Sausalito we also had it rigged for an asymmetrical spinnaker.
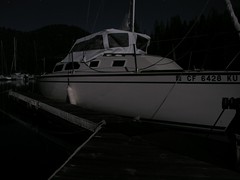
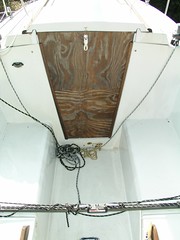
Pop-Top enclosure:
It took a few years before we decided to buy the pop top enclosure for camping. It was no longer offered from the factory when I needed it, so my boat guy knew the company that made them for Schock, and ordered it directly. The new cover arrived a week or two later, I don't really remember now, and I installed it in my back yard. It didn't fit exactly how I imagined it would, but the darn thing works and thats all that matters. I don't really know what I would do now without it. The cover creates so much more room inside to store mostly our baggage while sleeping.
 |
 |
| Night image of the pop top tent. |
Daytime image of the same thing |
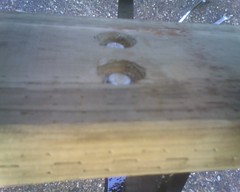
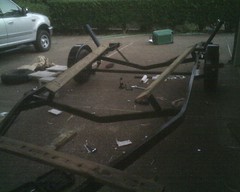
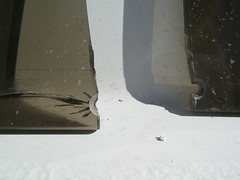
After the front end of our trailer broke off, we decided ti was time to make sure the rest of the trailer was in tip top shape before launching much more. While the boat was in the water at Huntington Lake for the summer of 2005, I took the trailer back home instead of leaving it at the lake. This could have led to a bad situation if anything happened to the boat while it was there since the trailer was 200 miles away, but luckily nothing of this sort was an issue. While it was at home, I got the whole trailer sandblasted and painted. Before doing that, I also had support beams welded to the wooden runner bars for added strength. I replaced the wooden runners and carpet with new ones. The new ones were made of pressure treated boards, and I counter sunk stainless steel bolts with washers into them, filled the top side with epoxy to make it smooth before adding the carpet. I put on two layers of carpet. The first layer was the size of the top of the board exactly and the second one wrapped around the whole thing. Because the boat was also sand blasted and painted, I had to rewire all of the electrical on the trailer as well.
 |
 |
 |
 |
| Counter Sunk screws on new pressure treated boards |
New runners installed but not yet covered with carpet. |
Napped stainless stell bolt while trying to tighten and twist the runners. |
Added T bars for better runner support. |
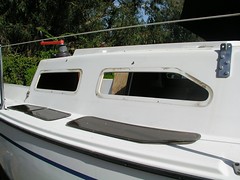
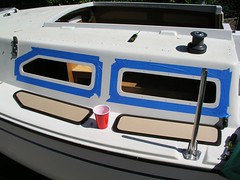
New tinted windows from Tap Plastics:
In the process of cleaning and fixing up the boat while the floor and mast were being worked on, I decided to replace the tinted windows since the current ones were very scratched and cracked near the screw holes. I found that Tap Plastics had the exact same tint and thinkness of UV Resistant acrilic and I had exact replica's of the windows made. The whole process cost about $250. I could have saved a little by drilling and counter syncing my own screw holes, but with so many other projects going on I let them do it for me.
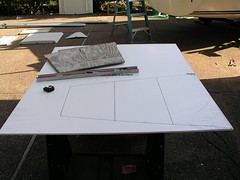
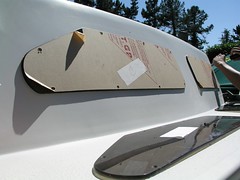
Seaboard doors from Tap Plastics:
| #1 |
#2 |
#3 |
#4 |
 |
 |
|
|
| Old plywood doors |
Seaboard ready to be cut |
coming soon |
coming soon |
Back
Comments (0)
You don't have permission to comment on this page.